
Today I'm going to show you how to press loose eyeshadow or pigment with alcohol. To learn step by step please follow the link below...
Before pressing your first shadow (without a bonding agent) there are a couple guidelines to follow...
-If the loose shadow or pigment you are using has chunky glitter or a lot of sparkle in it you probably wont be able to get it to press together. The sparkles will not let the actual shadow adhere together.
-Matte loose shadows or pigments also have difficulty adhere together. Usually to press these shades you would have to use a bonding agent.
-Not every loose shadow or pigment will work. PERIOD. A lot of pressing your own shadows is about experimenting and trying to see what will work out. For example, I tried to press OCC's Wasabi & it would just separate from the alchol, not even mixing in.
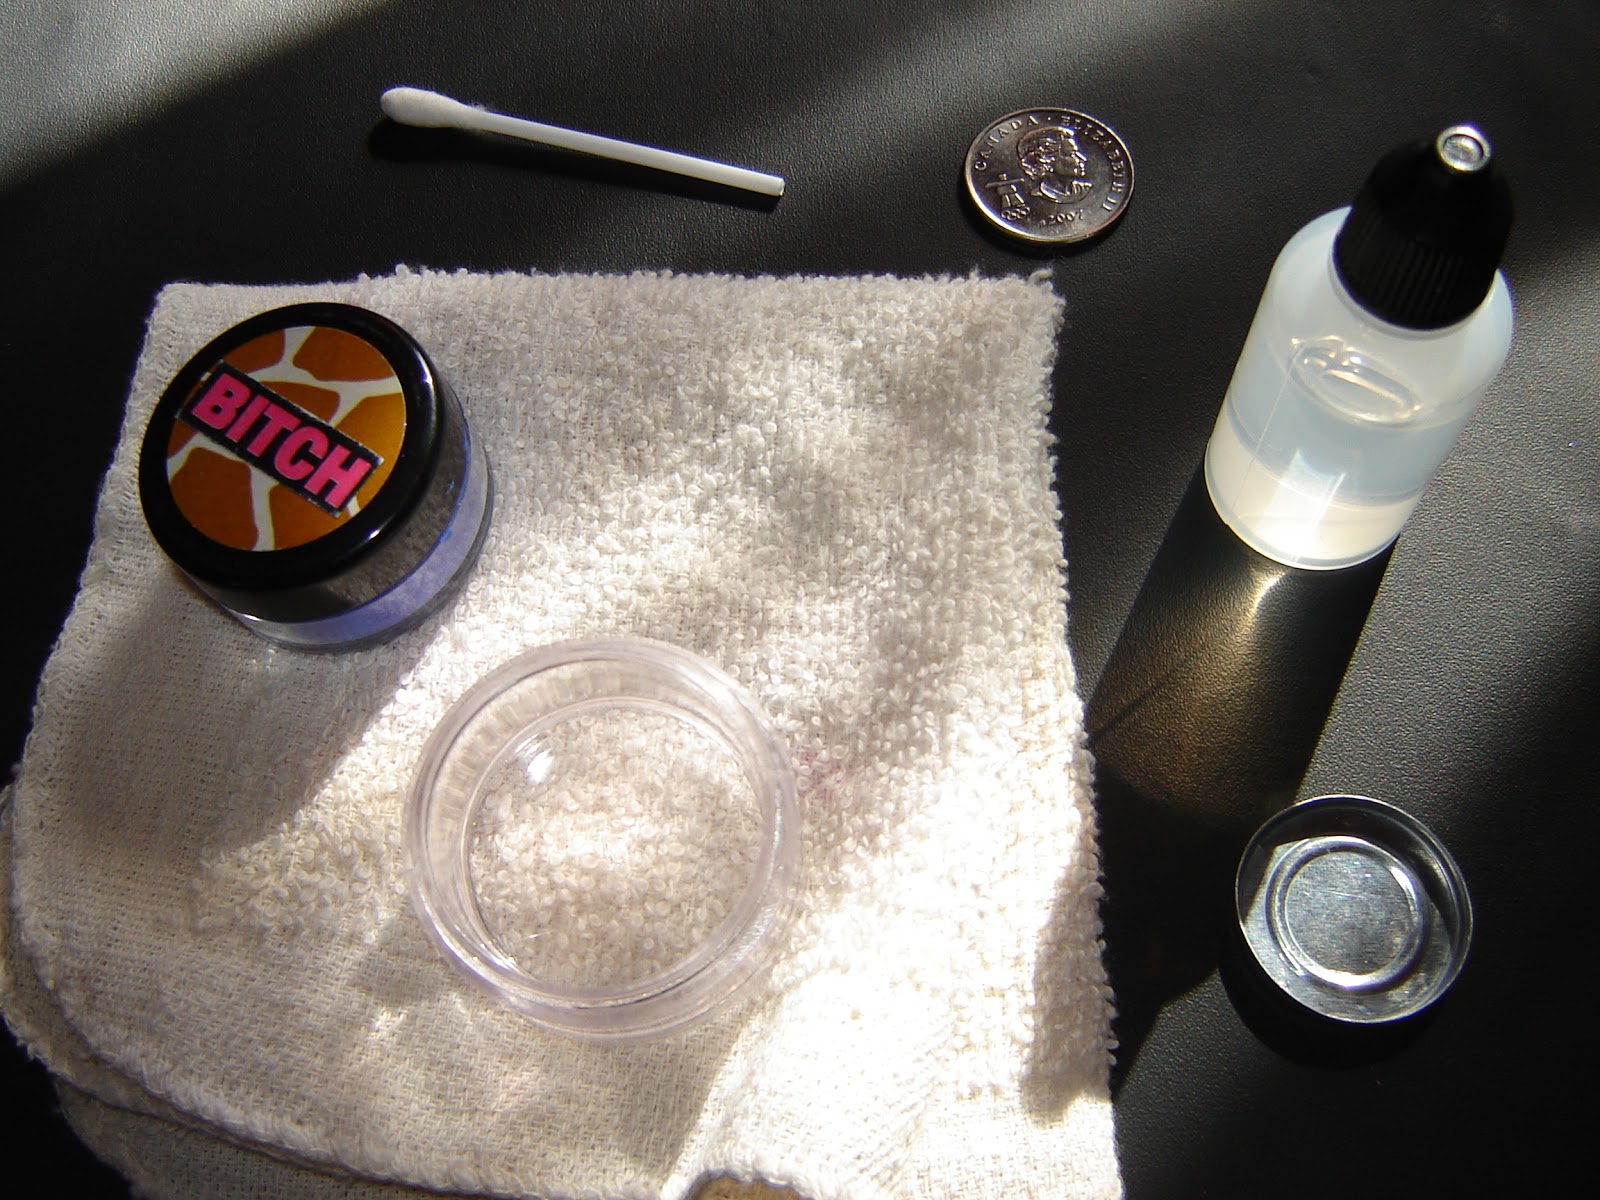
You will need...
-Loose Shadow/Pigment (Bitch Slap Cosmetics- One Beat Bitch)
-Eyeshadow Pan
-Mixing Container
-Rubbing Alcohol (70%-90%)
-Q-Tip with one end cut off
-Face Cloth
-Quarter
-Stack of book/ something heavy
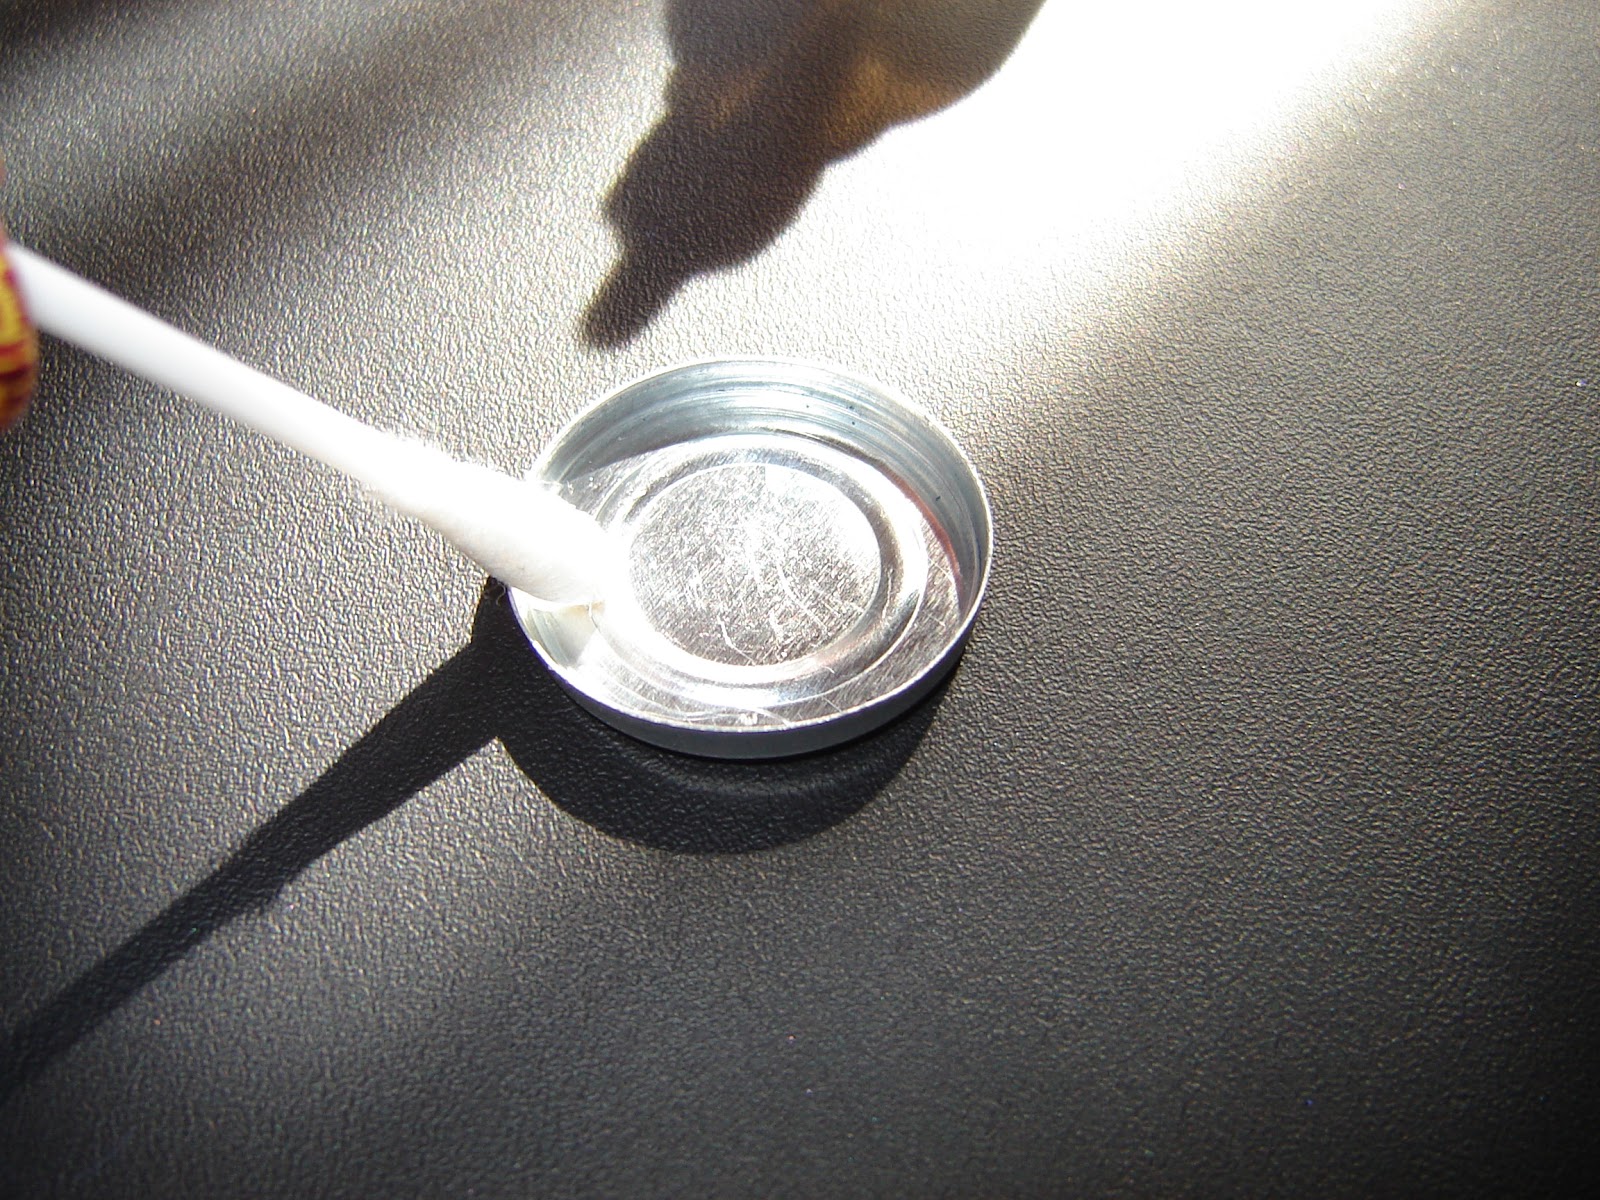
1. Clean the bottom of your eyeshadow pan with a touch of alchol & q-tip.

2. Using a thin tool remove the sifter from the top of the loose shadow jar.

3. Dump a good amount of color into your mixing jar.

4. Add half the amount of alcohol.
(When it comes to mixing the loose color/pigment & the alcohol I just eye it out. I really don't have the perfect measurement.)


5. Mixing until you get a batter like constancy.

6. Pour your batter into the eyeshadow pan. Level off the top of the pan. You can do this by lightly dropping the pan onto a table.

7. Let your liquidity shadow dry for anywhere between 2-4 hours. I personally like to leave mine over night. This is kind of the make or break time. If your eyeshadow is going to fail, it will now. If you leave your eyeshadow to dry and you find it is drying back into powder, it is a loose color that will probably not press into a pan unless you have a bonding agent.
8. Once your shadow is dry enough to touch you are ready to press. Take your face cloth or any piece of material and lay it on top of your shadow. Then place a quarter on top of the cloth & eyeshadow. Then layer a couple books on top of that. Let this dry for 2-4 hours.


9. Once you have uncovered your shadow your should be able to rub your finger or a brush along it and find brilliant pigmentation. You can use your shadow right away. :)


To place into a palette you will need to find a magnetic palette (ZPalette) & eyeshadow pans that are magnetic or buy small magnetics to stick onto the bottom of the pan. Or you can find palettes that already have pre-spaced spots for your eyeshadow tin.
I love pressing shadows. I love it even more when they work out. lol. I encourage everyone to try this simple DIY project. It's crazy easy to do, & you'll feel fantastic once you've 'made your own' eyeshadow.
If anyone has any questions please feel free to ask. :)
P.S Yes, my nails did change during this blog. lol.
Have you tried using wax paper instead of a wash cloth?
ReplyDeleteNo, I haven't. I dont always use a cloth. If I have a scrap peice of material that doesn't have as many loose fibers I prefer to use that. However I have never tried wax paper so I have no idea if it would work. Im sure it would because all the principles are the same.
ReplyDeleteI use wax paper to protect my flat iron when taking the pans out of there cases/palettes.